How to Sync 2 Radarr or Sonarr with each other
This guide will explain how to sync two (or more) Radarr/Sonarr instances.
Why would you want to run two instances of Sonarr or Radarr?
- You want 1080p and 2160p versions of the same movie or episode.
- You want different versions of the same movie (Special Edition, Theatrical Cut, etc.)
- Etc.
Which options will we cover
- Option 1 (full sync): This option will show you how to create a 1:1 copy of your Radarr/Sonarr instances, as it will synchronize everything.
- Option 2 (profiles): This option will show you how to cherry-pick which movies/TV shows you want in 4K/2160p (UHD).
- Option 3 (tags): This option can be used for a full sync or to cherry-pick.
Preparation
We won't explain how to set up two Radarr/Sonarr instances for your system, as it depends on how it is installed and running.
For this, you need to have prepared the following:
- Two Radarr/Sonarr instances that are fully set up (Indexers, Custom Formats, Downloaders, etc.).
- One download client (two if you prefer Usenet and Torrents).
- Your download client must have two separate categories (movies-hd, movies-uhd, tv-hd, tv-uhd, etc.).
Warning
 You can not use the same root (media library) folder for both Radarr/Sonarr instances.
Make sure to use two separate root folders in Radarr and Sonarr (movies-hd, movies-uhd, tv-hd, tv-uhd, etc.).
Option 1 (full sync)
In this example, we will use two Radarr instances (the basics are the same for Sonarr).
- Radarr 1 = The main 4K/2160p (UHD) Radarr.
- Radarr 2 = The 1080p (HD) Radarr that we have set up for a streaming-optimized quality profile.
This option will show you how to create a 1:1 copy of your Radarr/Sonarr instances, as it will synchronize everything.
Adding the Radarr Sync list (using full sync)
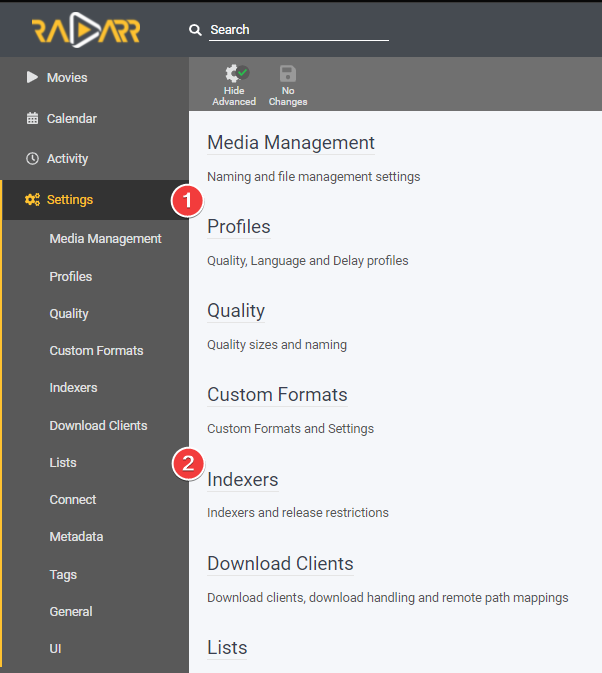
In Radarr 2, go to Settings => Import Lists.
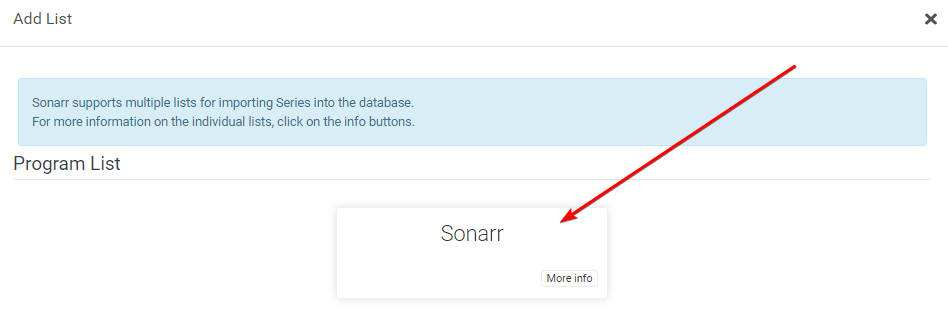
Click on the + to add a list and select Radarr
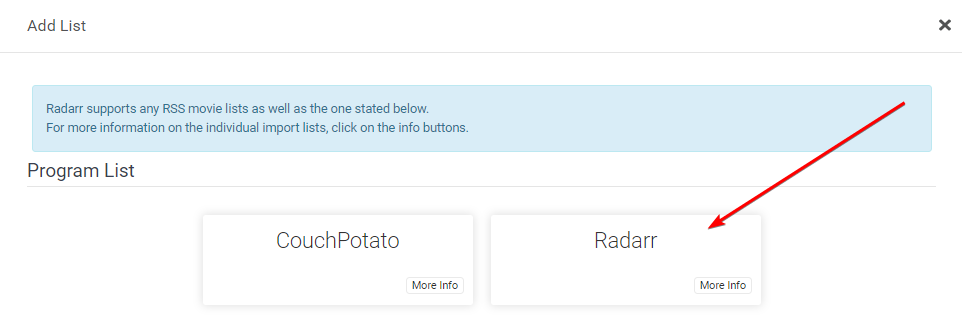
You will get a screen with the following options:
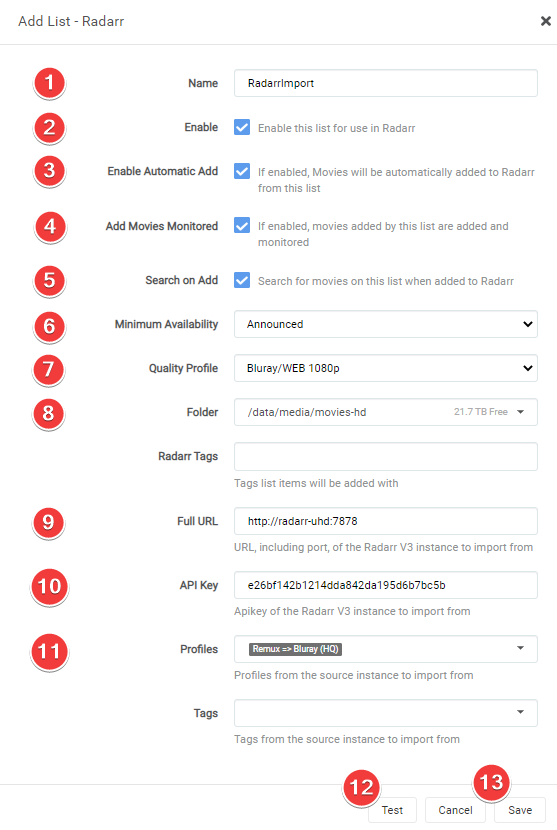
- The name you want to call your Sync list.
- Enable the list.
- Enable so the movies will be automatically added.
- Enable it so the movies will be added and monitored (if disabled, no search will be done for the movies).
- Enable so Radarr will perform a search when a movie is added.
- When Radarr shall consider a movie as available. (1)
- The Quality Profile you want to use for Radarr 2.
- Your Radarr 2 root location for your media library.
- Tags that will be added on import from this list (if you use multiple lists, it makes it easier to determine from which list the movie was added)
- The Full URL to Radarr 1 (Use container name with
.internaldomain likehttp://radarr.internal:7878or local URL if they run on the same system). - Your API Key of Radarr 1.
- Which Profile of Radarr 1 you want to Sync with Radarr 2.
- [Optional] Use tags from Radarr 1 to add Movies to Radarr 2.
- [Optional] Add all movies from the chosen root folder from Radarr 1.
Radarr Download client setup (using full sync)
You do not need a separate download client for your two Radarr instances, and this can all be done with one download client (two if you prefer Usenet and Torrents).
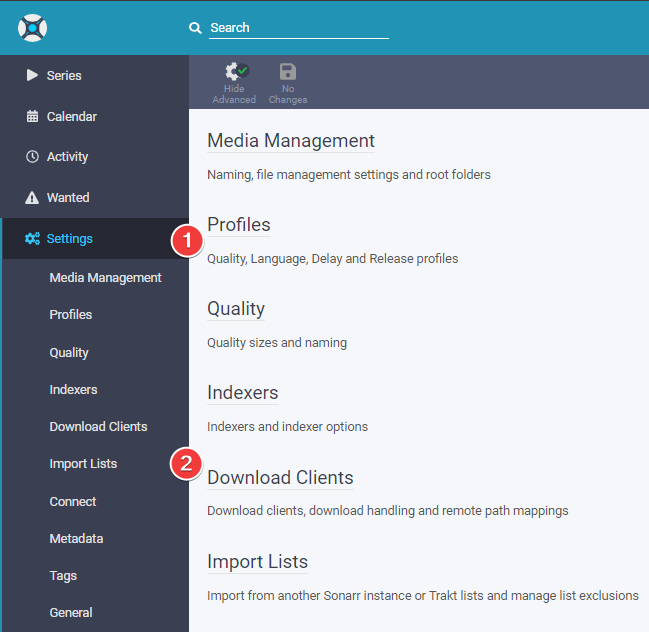
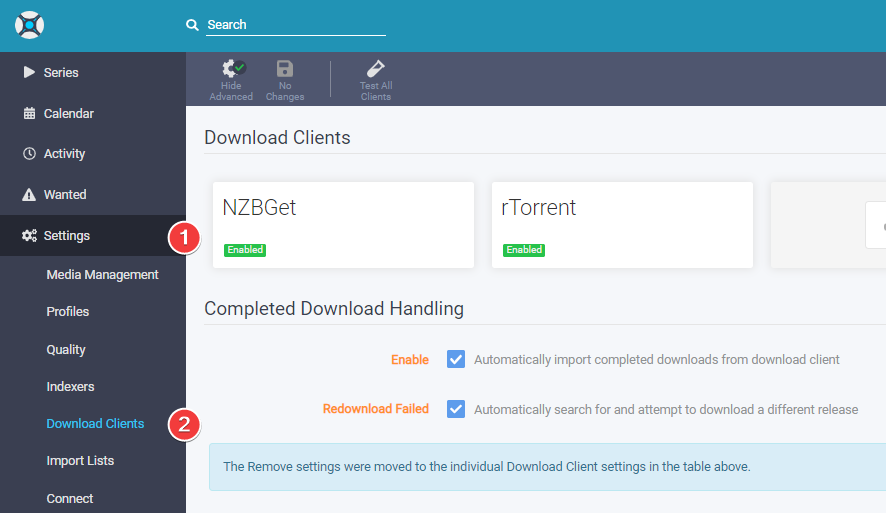
Settings => Download Clients
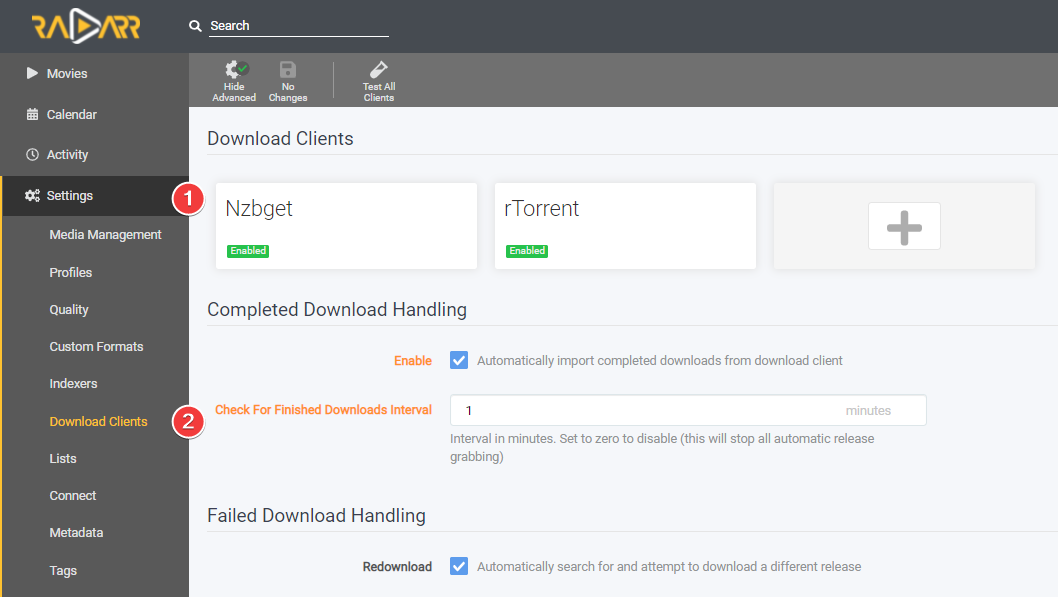
Select your preferred download client.
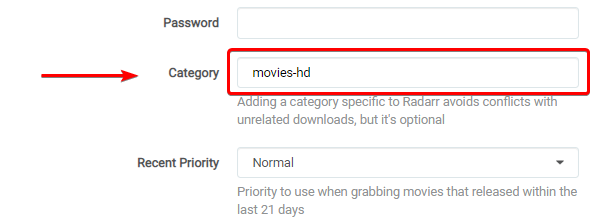
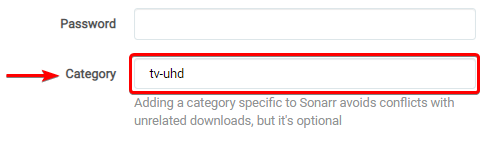
The only thing you need to change/create is a separate Category that you are going to use for Radarr 2
This must not be the same category you use for Radarr 1 - use a new Category.
How does this Radarr Sync work (using full sync)
You now only need to make use of Radarr 1. All movies you add to Radarr 1 will be synced to Radarr 2 at a scheduled time.
Option 2 (profiles)
In this example, we will use two Sonarr instances (The basics are the same for Radarr).
- Sonarr 1 = The main 1080p WEB-DL Sonarr.
- Sonarr 2 = 4K/2160p (UHD) WEB-DL Sonarr.
This option will show how to selectively add which movies/TV shows you want as 4K/2160p (UHD).
Extra preparation (using profiles)
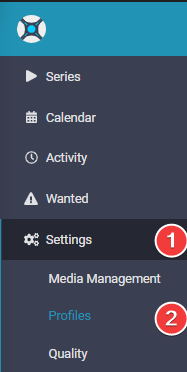
In Sonarr 1 go to Settings => Profiles
Clone your used profile and rename your profile from Profilename - Copy to Profilename!

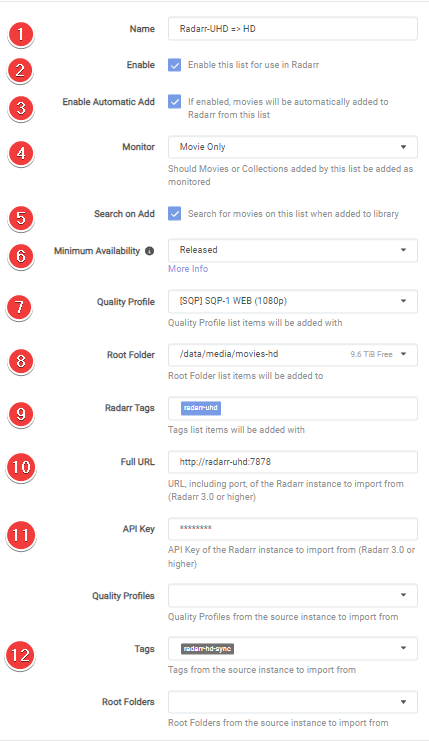
Adding the Sonarr Sync list (using profiles)
In Sonarr 2 go to Settings => Import Lists
Click on the + to add a list and select Sonarr
You will get a screen with the following options:
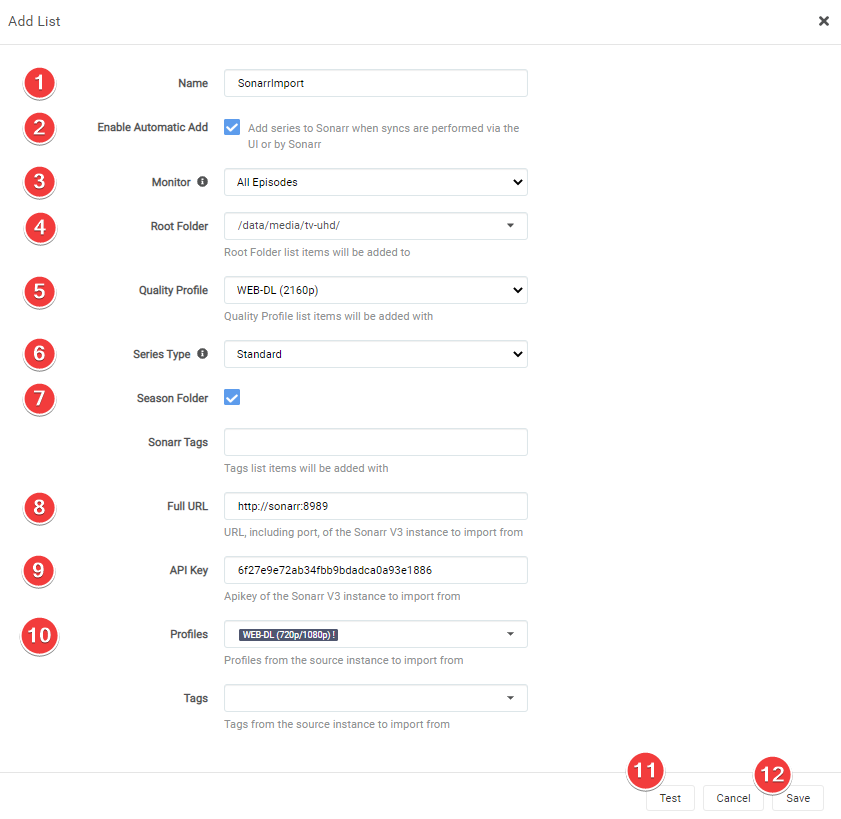
- The name you want to call your Sync list.
- Enable so that the TV Shows will be automatically added.
- Enable so Sonarr will perform a search when a TV Show is added.
- Choose how you want the series monitored initially. (2)
- Which new seasons should be monitored automatically? (3)
- Your Sonarr 2 root location for your media library.
- The Quality Profile you want to use for Sonarr 2.
- Series Type. (4)
- If you want to use Season Folders (RECOMMENDED).
- Tags that will be added on import from this list (if you use multiple lists, it makes it easier to determine from which list the TV Shows were added)
- The Full URL to Sonarr 1 (Use container name with
.internaldomain likehttp://sonarr.internal:8989or local URL if they run on the same system). - Your API Key of Sonarr 1.
- Sync season monitoring (SUGGESTION: DISABLED)
- The Cloned Profile of Sonarr 1 that we are going to use to sync with Sonarr 2.
- [Optional] Use tags from Sonarr 1 to add TV Shows to Sonarr 2.
- [Optional] Add all TV Shows from the chosen root folder from Sonarr 1.
- This is a Deprecated option.
Sonarr Download client setup (using profiles)
You do not need a separate download client for your two Sonarr/Radarr instances, and this can all be done with one download client (two if you prefer Usenet and Torrents).
Settings => Download Clients
Select your preferred download client.
The only thing you need to change/create is a separate Category that you are going to use for Sonarr 2
This must not be the same category you use for Sonarr 1, - use a new Category.
How does this Sonarr Sync work (using profiles)
You now only need to make use of Sonarr 1. When you have a TV show (or a movie if you use this option with Radarr) that you also want as 4K/2160p (UHD), you make sure you use the Cloned Quality Profile. And it will sync at a scheduled time.
Option 3 (tags)
In this example, we will use two Radarr instances (The basics are the same for Sonarr).
- Radarr 1 = The main 4K/2160p (UHD) Radarr.
- Radarr 2 = The 1080p (HD) Radarr we've set up for a streaming-optimized quality profile.
This option will show you how to create a 1:1 copy of your Radarr/Sonarr instances, as it will synchronize everything.
Add tags
There are different ways to add tags to your movies or shows in Radarr/Sonarr
- Manually add tags.
- Automated way in Radarr/Sonarr using
Auto Tagging. - 3rd party apps like Jellyseerr, Kometa, and others.
Manually add tags
In Radarr 1 select a movie you want to sync to Radarr 2, and in the tags box type the tag name you wish to use to trigger the sync in Radarr 2.
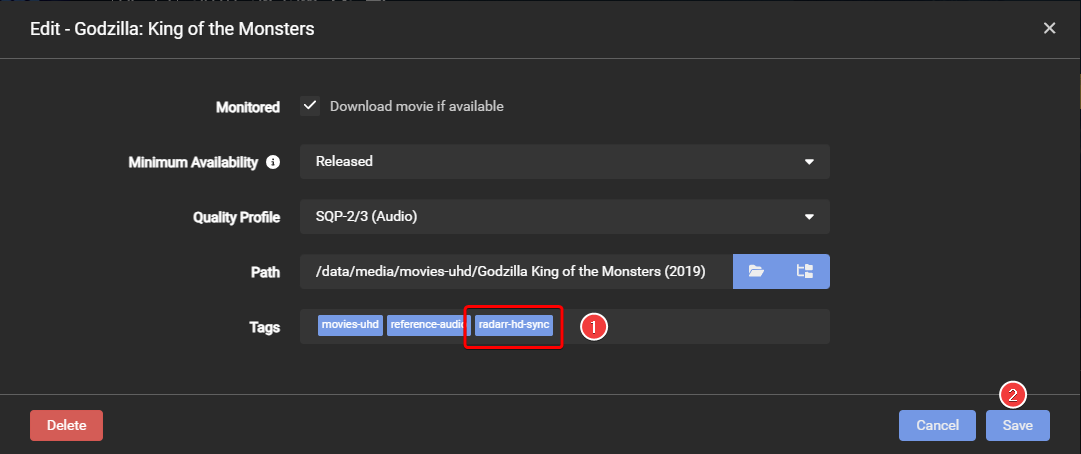
- In this example, we will use the tag:
radarr-hd-sync. - Click on Save.
Automated way
There are different ways to use the built-in Automated way, depending on which conditions you want to use. In this example, we are going to use the root folder
In Radarr 1 goto Settings => Tags => Auto Tagging, Click on the  sign and in the
 Add Auto Tag window, click again on the sign under conditions.
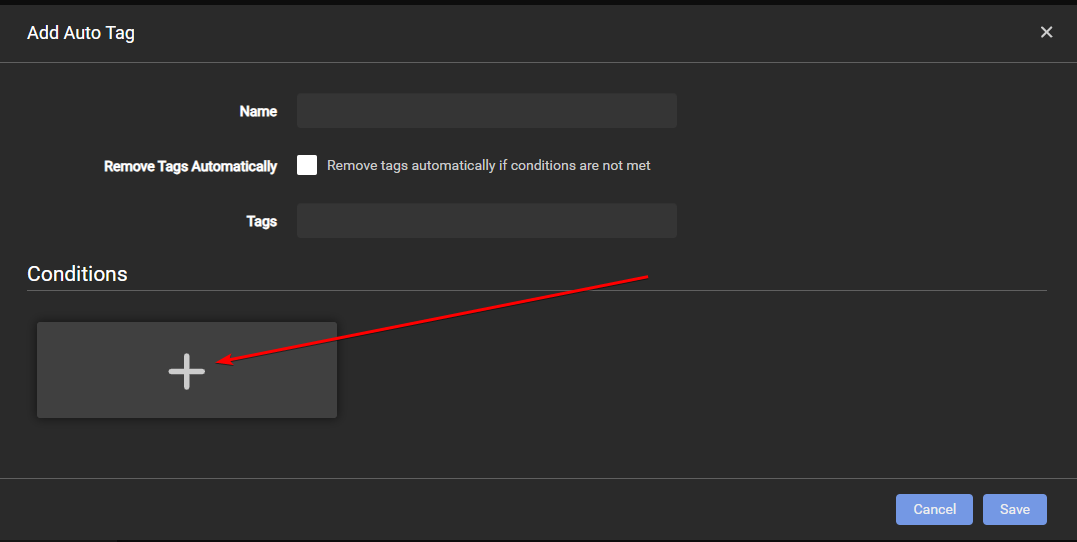
You will be presented with a new window to choose several conditions.
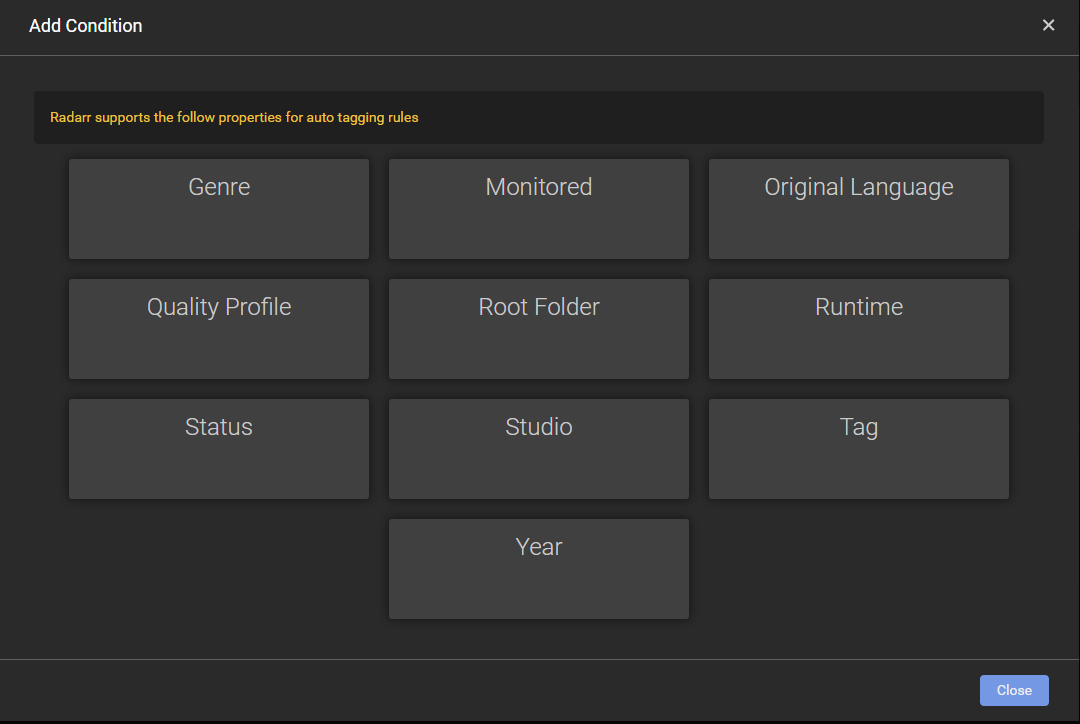
For this example, we are going to use the condition: Root Folder
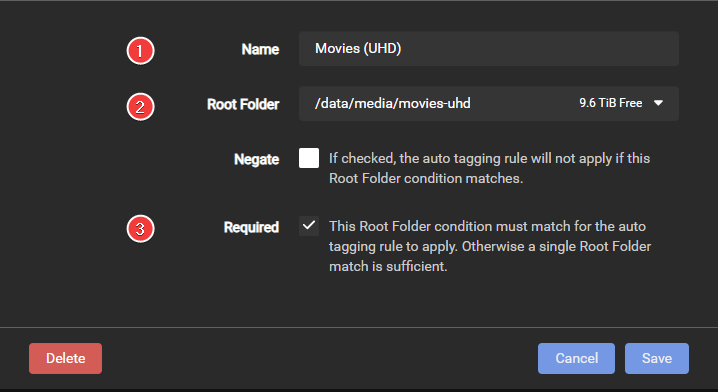
- The name used for the condition, in this example, we used
Movies (UHD). - The root folder that we want to keep track of, in this example, we used
/data/media/movies-uhd. - If you use multiple conditions, you can choose which condition is required, in this example, we enabled it.
After you add all the needed info and click on save, you will see the new condition you created.
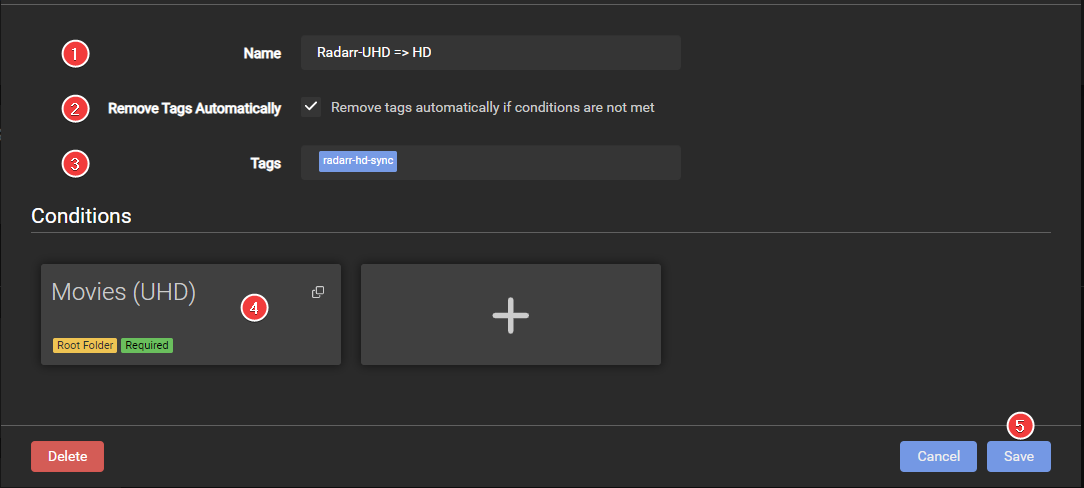
- The name used for the
Auto Tagging, in this example, we usedRadarr-UHD => HD. - If you want to remove the tags automatically if the condition no longer matches.
- The tags we will use in Radarr 2. In this example, we will use the tag:
radarr-hd-sync. - The condition you created before.
- Do not forget to click on
Save.
3rd party apps
You can use several third-party apps for this option. In this example, we will use Jellyseerr (The same concept also works with Overseerr).
In Jellyseerr, go to Settings => Services, where you will add Radarr/Sonarr (If you already added Radarr/Sonarr, click on edit).
If you have multiple Radarr added, make sure you edit it in Radarr 1
- The tags we will use in Radarr 2. In this example, we will use the tag:
radarr-hd-sync. - This is more of a Jellyseerr setting for your Radarr 1. Enable this setting if you would like to scan your Radarr/Sonarr server for existing media/request status. You should enable this setting so that users cannot submit requests for media that have already been requested or are already available.
- This is more of a Jellyseerr setting for your Radarr 1. Enable this setting to have Radarr/Sonarr automatically search for media upon approval of a request.
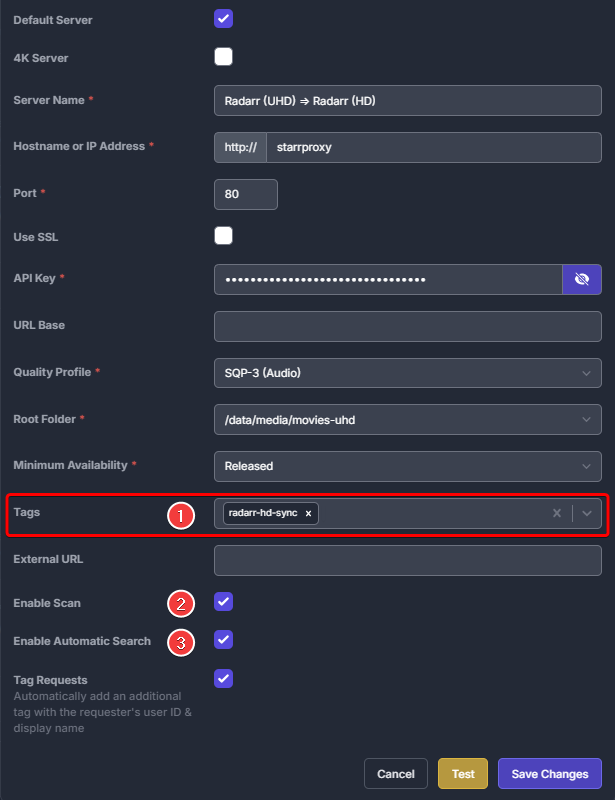
Adding the Radarr Sync list (using tags)
In Radarr 2 go to Settings => Import Lists
Click on the + to add a list and select Radarr
You will get a screen with the following options:
- The name you want to call your Sync list.
- Enable the list.
- Enable so the movies will be automatically added.
- Enable it so the movies will be added and monitored (if disabled, no search will be done for the movies).
- Enable so Radarr will perform a search when a movie is added.
- When Radarr shall consider a movie as available. (5)
- The Quality Profile you want to use for Radarr 2.
- Your Radarr 2 root location for your media library.
- Tags that will be added on import from this list (if you use multiple lists, it makes it easier to determine from which list the movie was added)
- The Full URL to Radarr 1 (Use container name with
.internaldomain likehttp://radarr.internal:7878or local URL if they run on the same system). - Your API Key of Radarr 1.
- The used tags from Radarr 1 to add Movies to Radarr 2.
Radarr Download client setup (using tags)
You do not need a separate download client for your two Radarr instances, and this can all be done with one download client (two if you prefer Usenet and Torrents).
Settings => Download Clients
Select your preferred download client.
The only thing you need to change/create is a separate Category that you are going to use for Radarr 2
This can not and should not be the same category you use for Radarr 1, but a separate Category.
How does this Radarr Sync work (using tags)
Depending on your chosen option, it will sync movies from Radarr 1 to ^^ Radarr 2 at a scheduled time.
-
- Announced: Radarr shall consider movies available as soon as they are added to Radarr. This setting is recommended if you have good private trackers that do not have fakes.
- In Cinemas: Radarr shall consider movies available as soon as movies hit cinemas (Theatrical Date on TMDb) This option is not recommended.
- Released: Radarr shall consider movies available as soon as the Blu-Ray or streaming version is released (Digital and Physical dates on TMDb) This option is recommended and likely should be combined with an Availability Delay of
-14or-21days.
-
- All Episodes: Monitor all episodes except specials
- Future Episodes: Monitor episodes that have not aired yet
- Missing Episodes: Monitor episodes that do not have files or have not aired yet
- Existing Episodes: Monitor episodes that have files or have not aired yet
- Recent Episodes: Monitor episodes aired within the last 90 days and future episodes
- Pilot Episode: Only monitor the first episode of the first season
- First Season: Monitor all episodes of the first season. All other seasons will be ignored
- Last Season: Monitor all episodes of the last season
- Monitor Specials: Monitor all special episodes without changing the monitored status of other episodes
- Unmonitor Specials: Unmonitor all special episodes without changing the monitored status of other episodes
- None: No episodes will be monitored
-
- All Seasons: Monitor all new seasons automatically
- No New Seasons: Do not monitor any new seasons automatically
-
- Anime: Episodes released using an absolute episode number
- Daily: Episodes released daily or less frequently that use year-month-day (2017-05-25)
- Standard: Episodes released with SxxEyy pattern
-
- Announced: Radarr shall consider movies available as soon as they are added to Radarr. This setting is recommended if you have good private trackers that do not have fakes.
- In Cinemas: Radarr shall consider movies available as soon as movies hit cinemas (Theatrical Date on TMDb) This option is not recommended.
- Released: Radarr shall consider movies available as soon as the Blu-Ray or streaming version is released (Digital and Physical dates on TMDb) This option is recommended and likely should be combined with an Availability Delay of
-14or-21days.
Questions or Suggestions?
